Build an electromagnet
Build an electromagnet to demonstrate how electricity can be converted to magnetism.

Overview
After challenging themselves to create a simple electromagnet, your students can then challenge each other to see which prototype is the strongest, measured by how many paper clips their electromagnets can pick up.
Instructions
What you'll need
- Chart paper and felt pens
- Enameled wire
- Dry cell batteries and holders
- Sandpaper
- Iron nails
- Insulated alligator clips
- Steel paper clips
- "Build an electromagnet" worksheet for each student
- "Build an electromagnet competencies self-assessment" for each student
If you can, try constructing your own electromagnet beforehand so you understand how it’s done.
Safety first
- Metal components in the circuit you are building will get warm during the activity, so don’t touch the batteries, alligator clips, coil, or paper clips.
- When connecting and disconnecting the wires from the batteries, only touch the rubber parts of the alligator clips.
- Disconnect the circuit every two minutes to allow it to cool down.
Creating a friendly and fair competition
- Part of this activity involves your students competing to see who can create the strongest electromagnet. This is a perfect opportunity to introduce the idea of variables and how they can impact an experiment.
- Ask your class how they might go about making sure that a free throw contest in basketball is fair. How would they make sure that no competitor has an unfair advantage?
- This can be done by using the same ball and shooting at the same hoop and from the same line.
- All of the things that can be different in an activity are called “variables” and in science the objective is to control all of those variables.
Building the electromagnets
- Students will work individually to create an electromagnet. They should complete the "Build an electromagnet" worksheet as they follow the below steps.
- Wrap the wire tightly around the nail to create a coil, leaving 6 cm of wire sticking out at each end of the nail.
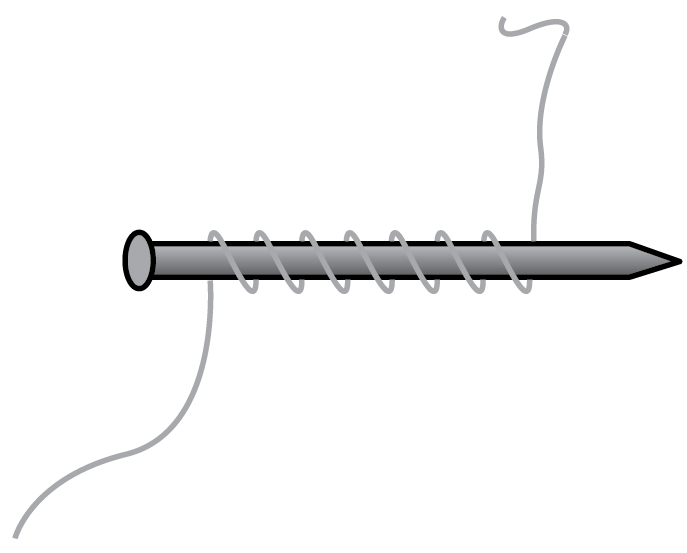
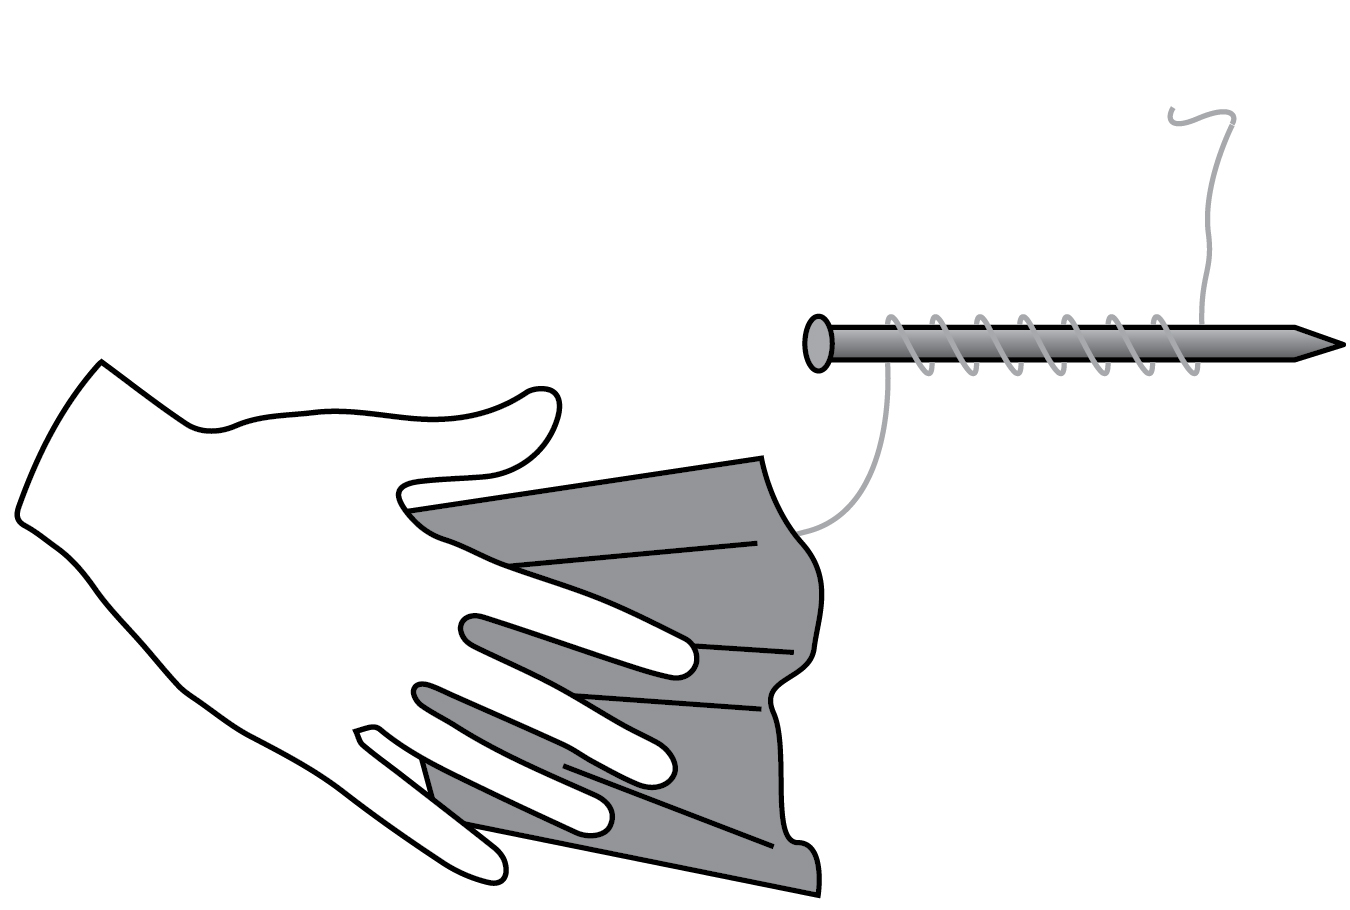
- Use the sandpaper to scrape away the enamel coating at both ends, exposing about 2 cm of copper wire.
- Connect the ends of the coil to the battery using the insulated alligator clips.
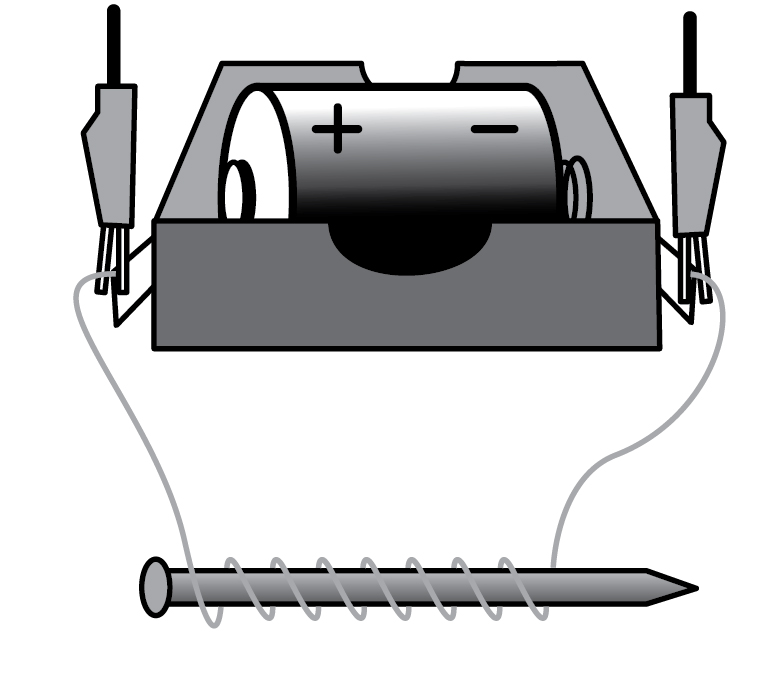
- Place the electromagnet close to the edge of the table or desk so the nail hangs over the edge. Then hold one of the steel paper clips close to the nail.
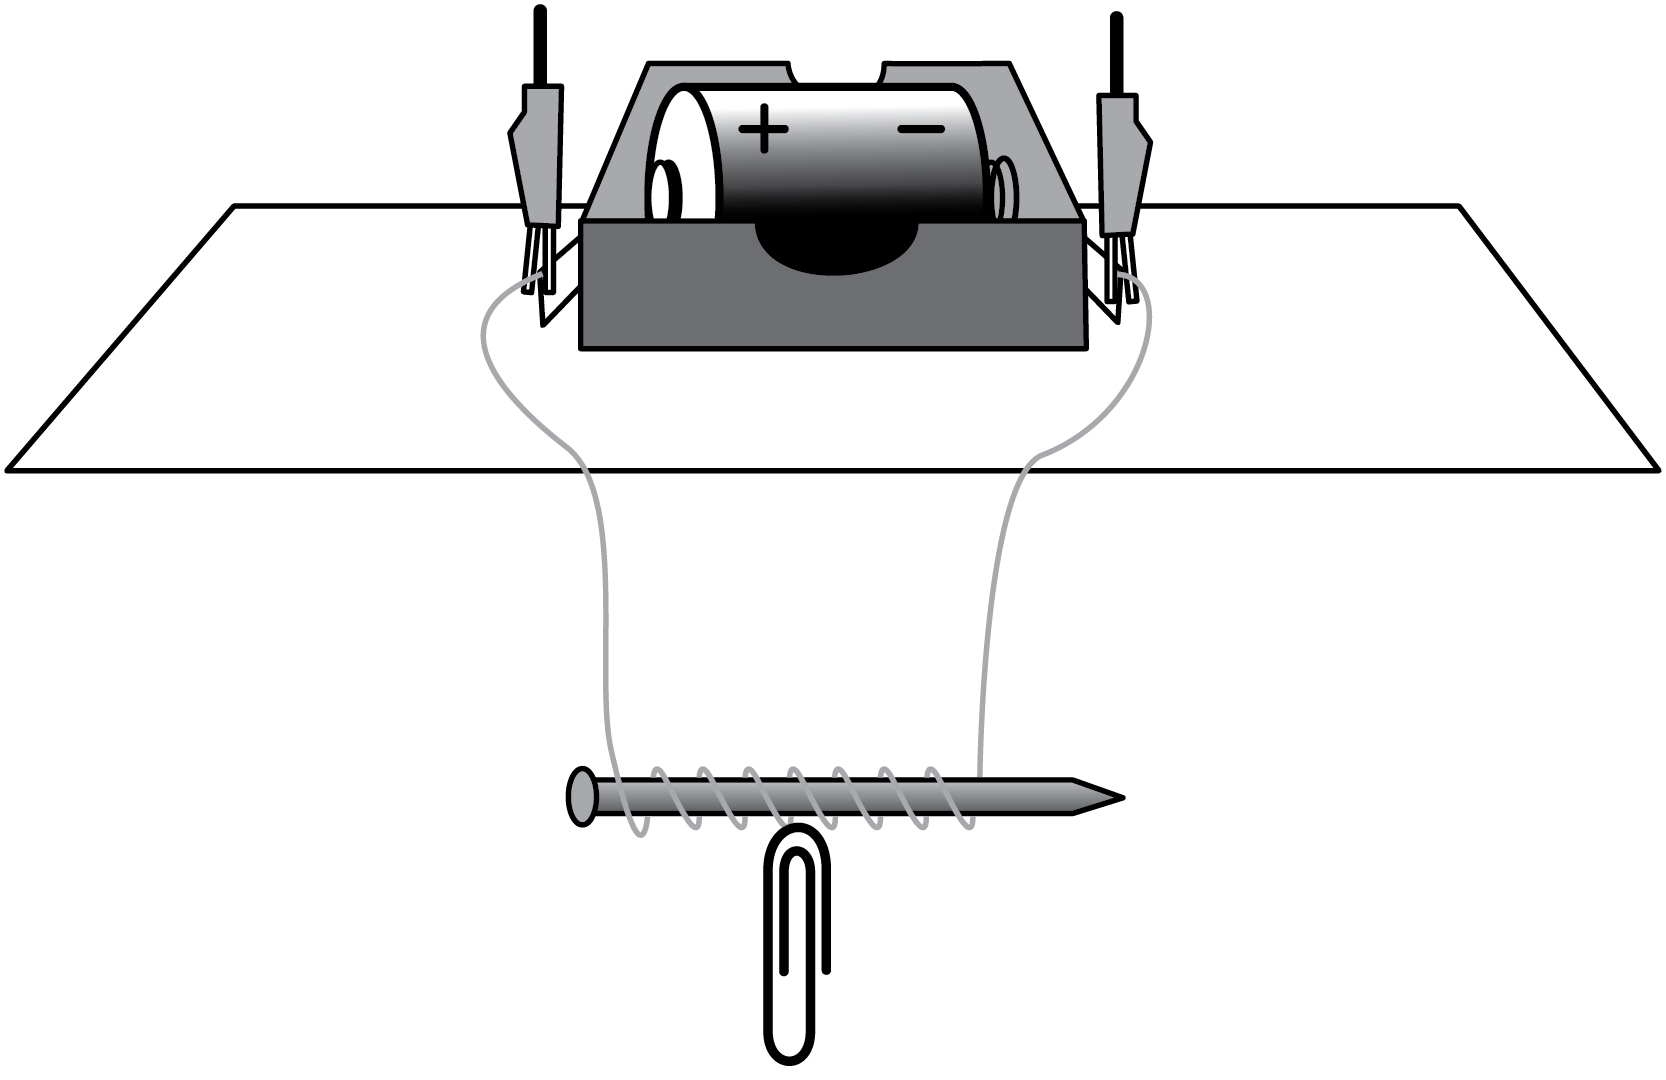
- Continue to hold paper clips close to the nail and, using the chart paper and felt pens, keep track of how many paper clips each student's electromagnet is able to hold up.
Hypotheses and testing the electromagnets
- Gather the students and talk about different ways they could increase the number of paper clips their electromagnet can hold.
- On their worksheet, have your students write a hypothesis on how to make a stronger electromagnet. Encourage them to write their hypotheses using “if, then” statements.
- Have students test their hypotheses by changing something about their electromagnet and seeing how many paper clips it can hold. Ensure that they are filling in their worksheets as they test.
Document and debrief
- Bring the class together again and have students share their hypotheses and the results of their testing. Challenge them to think about other variables they might like to test.
Modify or extend this activity
Have your students explore other variables that can affect the strength of an electromagnet by using materials brought from home or found elsewhere in the school.
Curriculum Fit
Grade 7 Science
Content
- Electromagnetism
Curricular competencies
Questioning and predicting
- Demonstrate a sustained intellectual curiosity about a scientific topic or problem of personal interest
- Identify a question to an answer or a problem to solve through scientific inquiry
Planning and conducting
- Collaboratively plan a range of investigation types, including field work and experiments, to answer their questions or to solve problems they have identified
- Ensure that safety and ethical guidelines are followed in their investigations
Processing and analyzing data and information
- Use scientific understanding to identify relationships and draw conclusions
Applying and innovating
- Co-operatively design projects
Communicating
- Communicate ideas, findings and solutions to problems
Grade 7 Applied Design, Skills, and Technologies
Content
- Power technology
- Forms of energy
- Devices that transform energy
Curricular competencies
Applied design - prototyping
- Construct a first version of the product or a prototype, as appropriate, making changes to tools, materials, and procedures as needed
- Identify a question to an answer or a problem to solve through scientific inquiry
- Explore and test a variety of materials for effective use
Applied design - testing
- Test the first version of the product or the prototype
- Gather peer and/or user and/or expert feedback and inspiration
- Make changes, troubleshoot, and test again
Applied design - sharing
- Demonstrate their product and describe their process, using appropriate terminology and providing reasons for their selected solution and modifications
Assessments
- Observe your students while they are working on the activity and note their ability to:
- Work collaboratively while following safety guidelines.
- Ask questions while working in groups.
- Make observations, record data, and analyze results.
- Establish and then test a hypothesis for making the electromagnet stronger.
- Communicate ideas and findings using scientific language and representations.
- Explain how the magnetic force could be varied.
- Have students complete the "Build an electromagnet competencies self-assessment" sheet.
Teaching Notes
Building an electromagnet
- An electromagnet sounds complicated but is very simple technology, consisting of a coil of wire with an electrical current flowing through it wound around an iron core. The coils and iron core become magnetized as electricity flows though the circuit. When the current in the wire stops, the coil and core are no longer magnetized. That’s why an electromagnet is known as a temporary magnet. Bar magnets and fridge magnets are examples of permanent magnets.
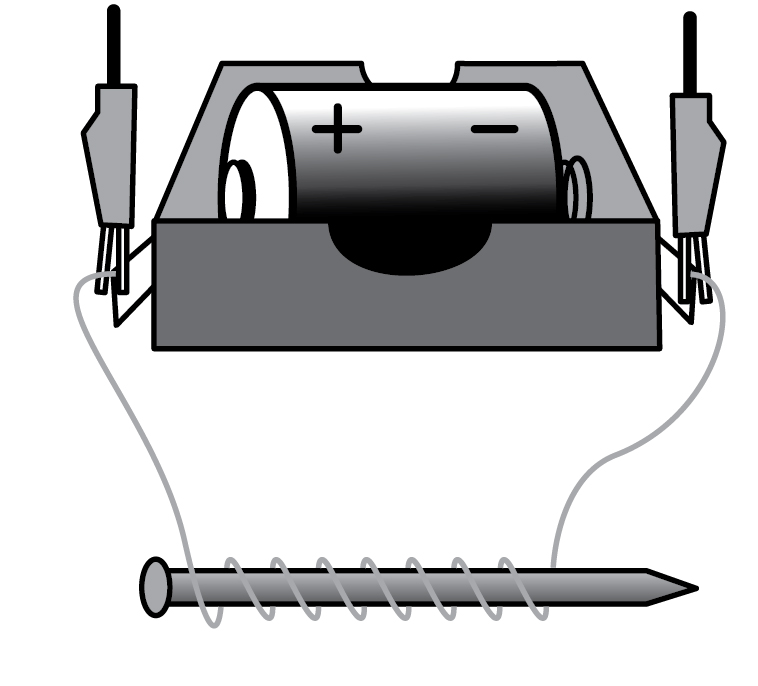
- In this activity, students manipulate variables to determine what affects the strength of an electromagnet. Variables include the amount of wire, the number of batteries used, and the size of the iron core. Students test their designs using steel paper clips.
- Because electromagnets can be turned on and off, and the strength of the magnetism can be changed by the amount of electrical current flowing through the device, they are useful in real world applications. Magnetic resonance imaging (MRI) equipment, scrapyard cranes, Maglev trains, and eye surgery equipment all use electromagnets.
Scientific investigation
- A scientific investigation is a structured approach for testing a question by exploring a cause-and-effect relationship. One way to create a stronger electromagnet is by adding more batteries to a circuit. This discovery could be realized through open-ended exploration or by first establishing a hypothesis: “I think that adding more batteries to the circuit will make a stronger magnet.” Either way, the student can show that the magnet is stronger as a result of adding more batteries.
- Hypotheses are most effective if stated with “If…, then…” language. “If I do this (1), then that will happen (2).” The (1) is a variable, something that the student is testing to see what the outcome (2) will be. Ideally, all the other conditions remain unchanged. This ensures that changing the variable (1) is what causes the outcome (2). This is known as a fair test.
- Other possible hypotheses for this activity include:
- If we add more wire wraps to the nail, then the magnet will be stronger.
- If we put extra batteries in the circuit, then the magnet will be stronger.
- If we use a smaller core, then the magnet will pick up fewer paper clips.


