Build an electric motor
Explore how the relationship between electricity and magnetism work to power an electric motor.


Overview
In the same way that electrical current creates a magnetic field, the reverse is also true. In this activity, your students will build electric motors that are enabled by magnets. This hands-on experience has real-world application, as all electric motors in our lives come from this basic principle.
Instructions
What you'll need
Each group will need:
- Tape
- Large markers
- “Build an electric motor” worksheet for each student
- 120 cm of enamelled wire
- Sandpaper
- 2 dry cells (batteries) and holders
- 2 wires with alligator clips
- 1 ceramic magnet
- 2 large paper clips
It’s a good idea to build your own electric motor in advance so you know how to do the activity and you can work through the troubleshooting steps.
Safety first
- Ceramic magnets are powerful and can damage electronic equipment. Keep them away from all devices like smartphones, tablets, and computers.
- Metal components in the circuit you are building will get warm during the activity, so don’t touch the batteries, alligator clips, coil, or paper clips.
- Remember to disconnect the wire after each observation.
Building the electric motor
Put your students into groups of two or three and then have them follow the following steps:
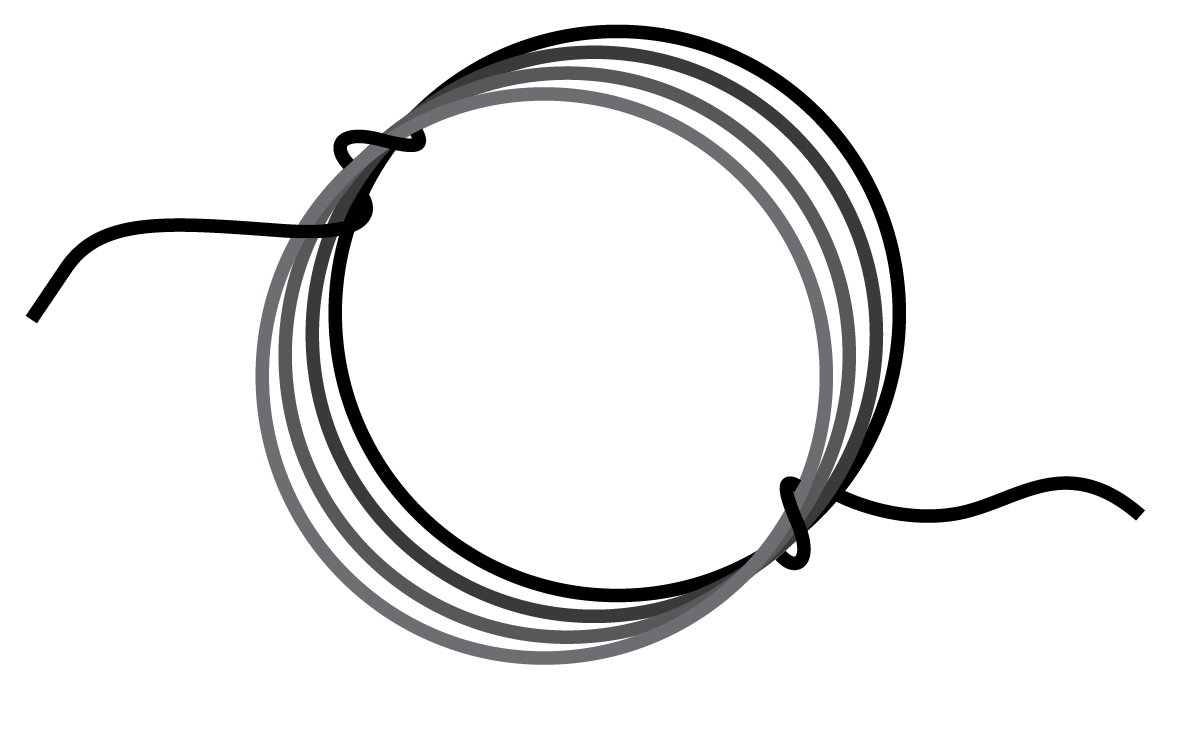
- Students need to create a coil by wrapping the wire tightly around the marker about 20 times; they should have 6 cm of wire sticking out at each end.
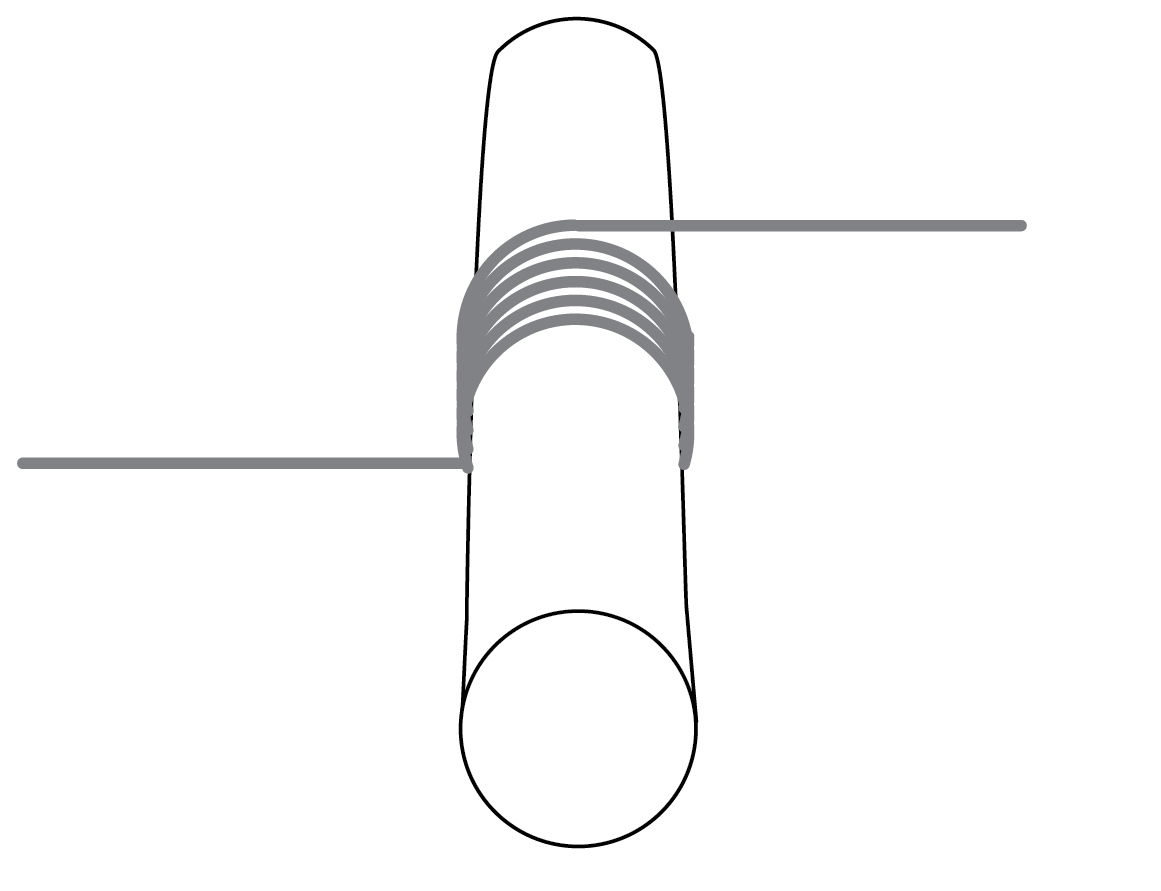
- Then they should loosen the coil slightly and remove it from the marker. To keep the coil from unravelling, have students twist each wire end around one side of the coil.
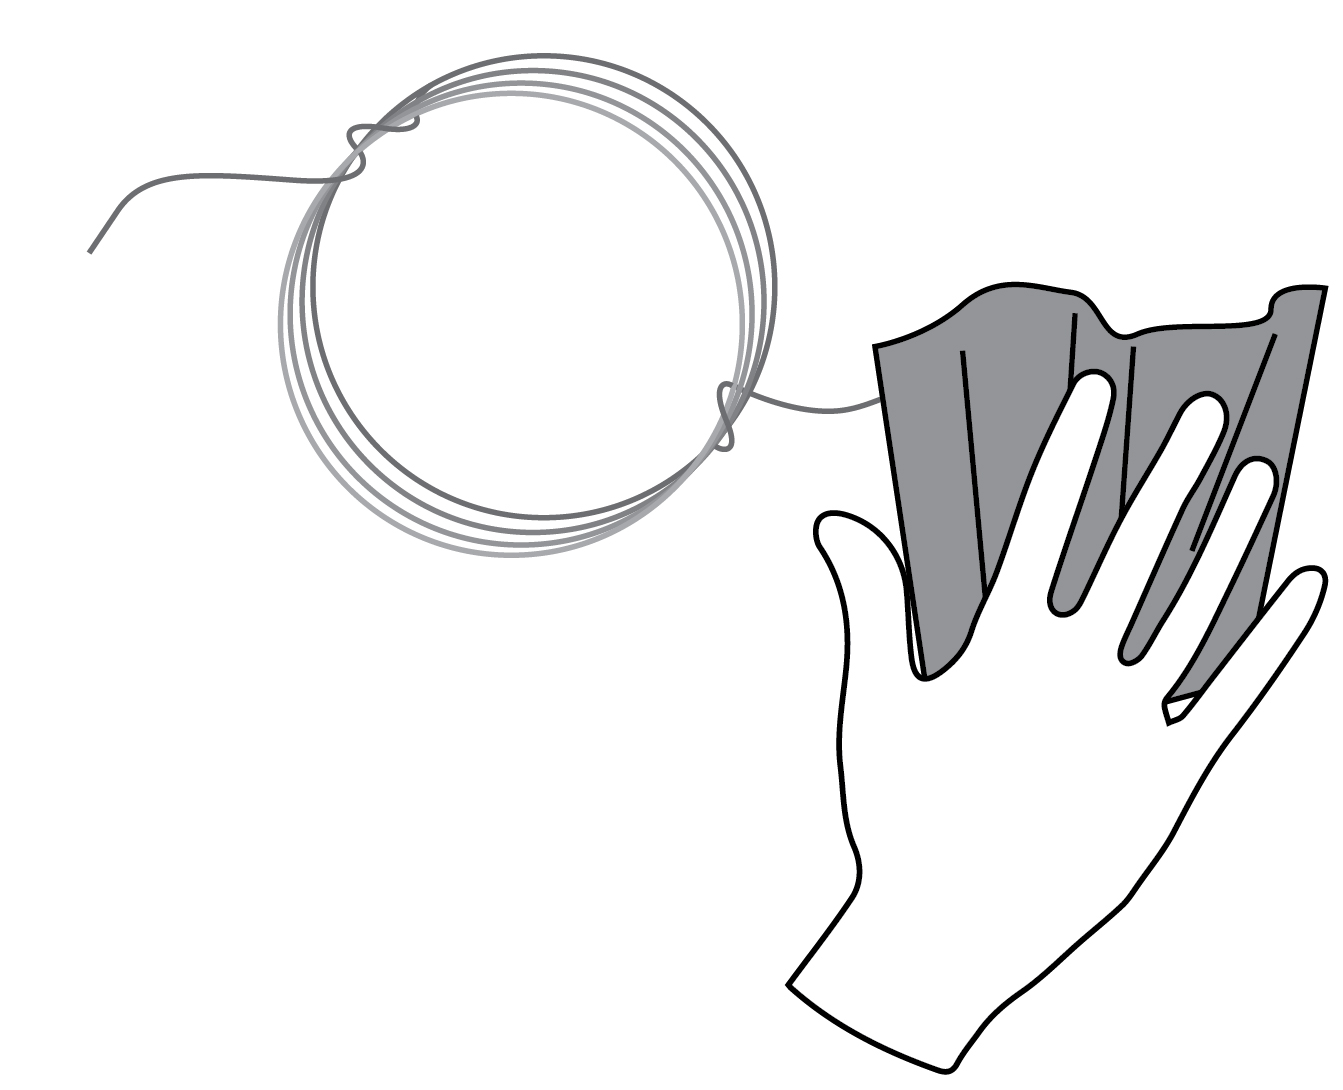
- Students can use sandpaper to scrape away the coating at both ends, exposing about 2 cm of wire.
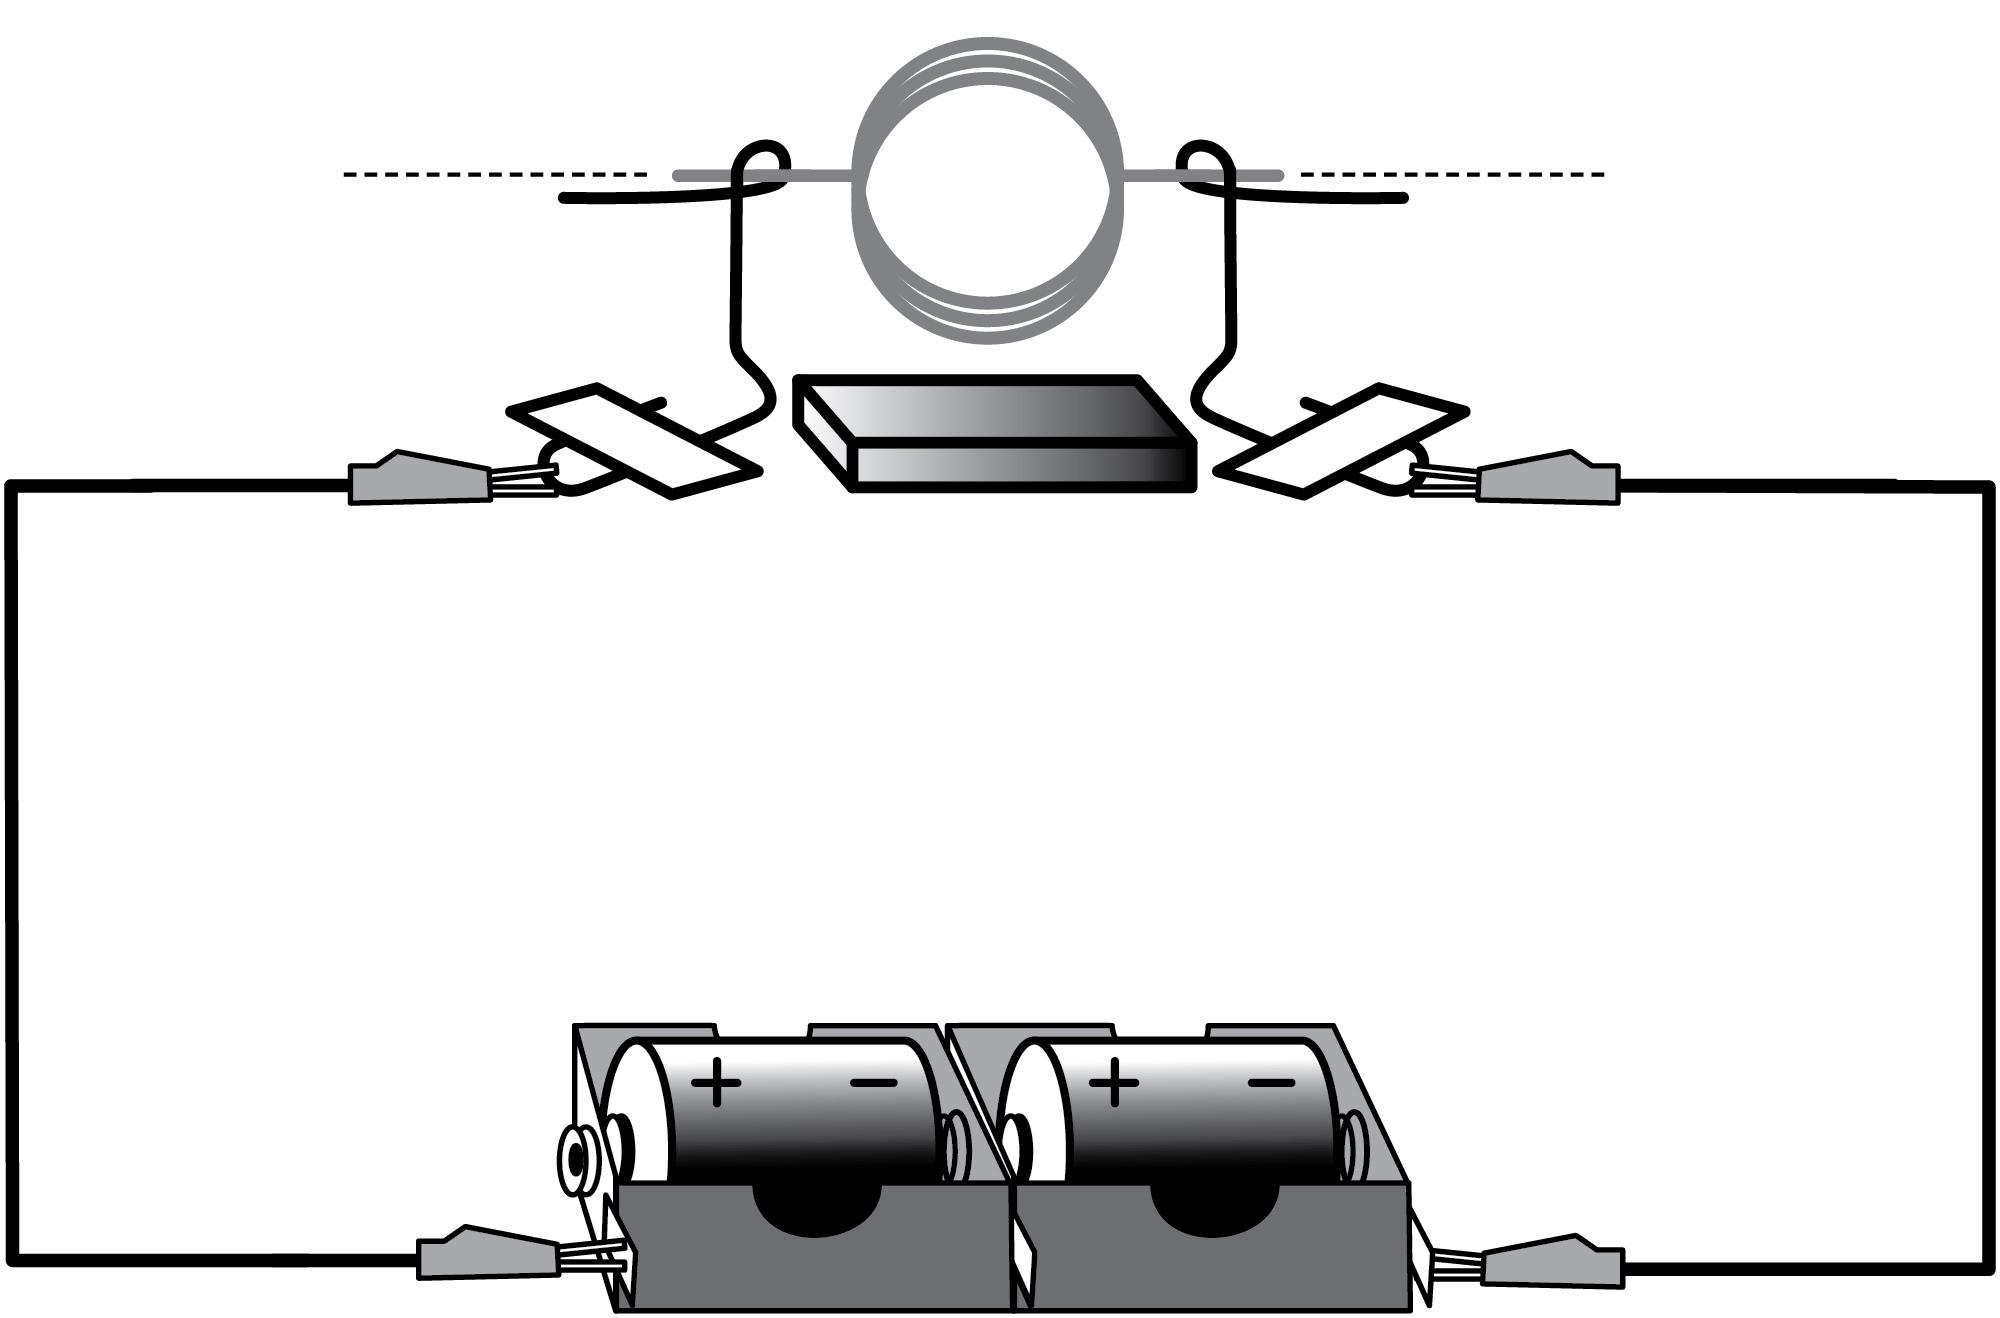
- Next, students should bend the paper clips to create holders for the coil. Tape can be used to secure the paper clips to the table, and the ends of the coil should be stuck out through the loops in the paper clips. The paper clip loops must be level so the coil can spin.
- Students can then connect the alligator clips to the batteries and paper clip holders as shown here. Note that once the clips are connected, electricity is flowing through the circuit. Students may need to help the coil start spinning:
Troubleshooting the electric motors
If the coil doesn’t spin, here are some things students can try:
- Make sure that the loops of the paper clip holders are level so the coil is balanced and can spin freely.
- The coil needs to be over the magnet for the motor to work properly. Try moving the coil or moving the magnet so the two are lined up.
- Check the circuit’s connections. The paper clips need to be touching the exposed ends of the coil wire or electricity cannot flow.
- Make sure that the batteries have power in them. Use a light bulb to check.
Document and debrief
- Make sure your students make observations on their "Build an electric motor" worksheet and that they complete the analysis.
- Have the groups share their experience creating an electric motor. Students can talk about what they found challenging, how they solved problems, and what success looked like.
Modify or extend this activity
Modifications
Students can test different variables that affect the way an electric motor works, including:
- The number of coils
- The shape of the coil; oval versus round, for example
- The amount of power, here determined by the number and size of batteries
- The position of the magnet
Curriculum Fit
Grade 7 Science
Content
- Electromagnetism
Curricular competencies
Questioning and predicting
- Demonstrate a sustained intellectual curiosity about a scientific topic or problem of personal interest
- Identify a question to an answer or a problem to solve through scientific inquiry
Planning and conducting
- Collaboratively plan a range of investigation types, including field work and experiments, to answer their questions or to solve problems they have identified
- Ensure that safety and ethical guidelines are followed in their investigations
Processing and analyzing data and information
- Use scientific understanding to identify relationships and draw conclusions
Applying and innovating
- Co-operatively design projects
Communicating
- Communicate ideas, findings and solutions to problems
Grade 7 Applied Design, Skills and Technologies
Content
- Power technology
- Forms of energy
- Devices that transform energy
Curricular competencies
Applied Design - Prototyping
- Construct a first version of the product or a prototype, as appropriate, making changes to tools, materials, and procedures as needed
- Identify a question to an answer or a problem to solve through scientific inquiry
Applied Design - Testing
- Test the first version of the product or the prototype
- Gather peer and/or user and/or expert feedback and inspiration
- Make changes, troubleshoot, and test again
Assessments
- Use the "Electricity and magnetism: curricular competencies assessment" to make note of your students skills with group work
- Review the "Build an electric motor: competencies self-assessment" completed by students
- Use the "Build an electric motor" answer key in the teaching notes below to assess written work
Teaching Notes
- Moving electrons (electricity) generate a magnetic field around a wire, and the reverse is also true: moving magnets through coils of wire generates electricity. This is how electricity and magnetism work: the movement of one causes the other.
- One wire with electricity flowing through it creates a magnetic field. The more loops in the coil, the stronger the force of the magnetic field when an electrical current passes through it. In this activity the loop has 20 coils.
- The magnetic field created around the coil of wire has a north and a south pole, just like all magnets. When a magnet is placed underneath the coil, the like poles of the magnet will repel the like poles of the magnetic field around the wire at the same time as the opposite poles attract each other. This is what causes the coil to keep spinning.
- Note: Ceramic magnets are used instead of bar magnets as they have a much stronger field that is oriented north/south on opposite sides, unlike the traditional bar magnetics with north/south on opposite ends.
"Building an electric motor" worksheet answer key:
Observations
Describe what you see. Include sketches as necessary.
- The coil spins rapidly.
- The coil spins for a short time and then stops.
What do you hear?
- The coil spins so fast that it is making a sound as it rotates.
How long did your coil spin? What would make it stop?
- Answers will vary. Answers could include: The circuit is opened or broken; the batteries run out of power; an object obstructs the coil; etc.
Analysis and conclusions
Using your understanding of electricity and magnetism, explain in your own words what is happening in the circuit to make the coil spin.
- The wire has electricity flowing through it. This creates a magnetic field around the wire. Each of the coils of wire has a separate magnetic field around it so the coil has a strong magnetic field with a north and a south pole.
- The magnet underneath the coil of wire also has a strong magnetic field.
- The like poles of the magnet and the coil repel each other while the opposite poles attract each other. This causes the coil to spin.
What questions about electromagnetism do you have after today’s activity?
- Questions will vary
Activity Materials
Select what you need below.
76.9 kb • pdf
95.2 kb • pdf
151.8 kb • pdf