


Overview
Note: This activity is not recommended for grades K-3 because of its complexity and the materials used. See Modifications section for information on how to do a circuit-free version of this activity.
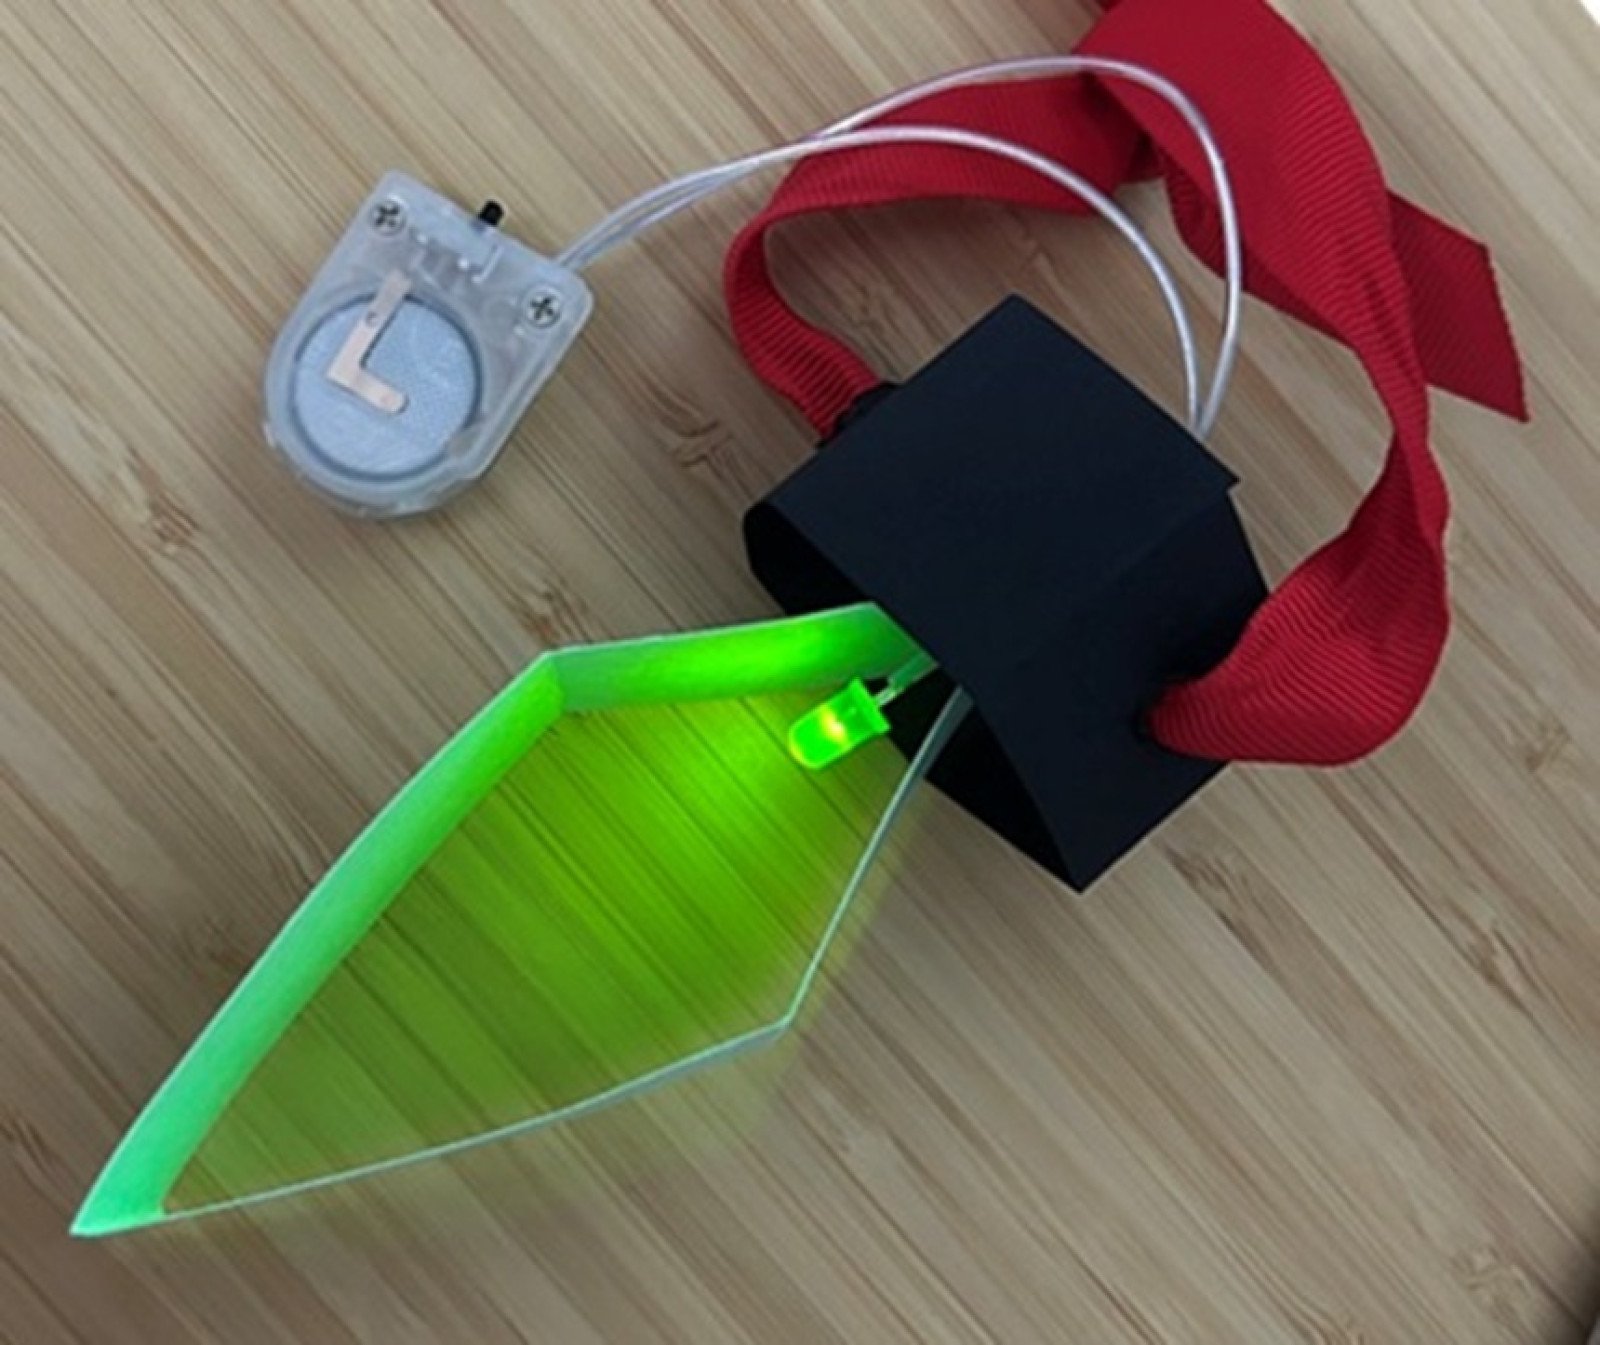
Light up your holidays while learning the basics about circuits. In this activity, your students will work to create a closed electric circuit on paper, allowing the flow of electrons to move from the battery to light up the LED, and back again, with the help of conductive copper tape. Once they have the paper circuit working, they can incorporate it into a paper ornament. String them all up together to create a garland or hang them up as individual decorations.
The holiday giveaway kits have all been claimed. Thank you for your interest in our new activity and the kits.
Instructions
What you'll need
Per student:
- Paper circuit ornament instructions handout
- Coloured strip of paper (approx. 1” x 8”)
- Black, gold, or silver strip of paper (approx. 1” x 7”)
- Strip of copper tape with conductive adhesive (approx. 3”, at least 2”)
- CR2032 battery and holder with switch
- Ribbon (approx. 12”)
- LED light (recommended 5mm red, yellow, white, or green)
- Blue light (and sometimes green) require 3-3.2V. The battery packs linked and included in kits only supply 3V, so sometimes these colours won't shine as brightly, or at all.
For the class to share:
- Glue stick or scotch tape
- Scissors
- One-hole punch
- Wire strippers (optional, used to expose extra wire on battery holders for easier taping)
Safety first:
- This is a live circuit—if it gets hot, turn it off.
- There are lots of small pieces that will be considered choking hazards.
- Do not touch both wires of the battery pack together while it’s turned on.
- Do not put scotch tape in the circuit.
Important notes and teacher preparation:
- The battery packs can be a bit tricky to work with. Make sure students are inserting the batteries correctly (or prepare them yourself prior to the lesson) and close them firmly.
- To make the circuit taping a little easier, you might want to strip the wire coating on the battery pack to expose the wires a little further prior to the activity.
Introduction:
- Show students an example of a finished circuit. Ask them how they think the light is turning on and off and generate a class discussion around what a circuit is.
- Explore the different components as a group:
- The LED lights have two legs (leads) of differing lengths. The longer one is the positive side of the LED and the shorter one is the negative side.
- The battery has a positive and a negative side, each connected to one of the wires on the battery pack.
- The copper tape is conductive on both sides and creates a path for the electrons to flow from the battery, through the LED, and back to the battery.
- For additional discussion, ask students to brainstorm other conductive materials.
Make the circuit:
Walk students through the following steps to set up the circuit for their ornament. Refer to the paper circuit ornament instructions for pictures of each step.
- Straddle the LED light on the battery, with the long leg on the positive side, to ensure that they’re working.
- Strip the edges of the wires on the battery pack to ensure that there is around 0.5”of exposed wire. Put the battery in the battery pack after this.
- Determine which wire is the positive wire by turning on the battery pack and touching one wire to each leg of the LED (making sure that the wires don’t touch each other). When the light turns on, make a note of which wire was touching the long leg – this is the positive wire. (It should be the wire on the left if you’re looking at the battery pack from the top where it opens)
- Cut off a small strip of the coloured strip of paper.
- Straddle the LED over the small strip of paper so that one leg is on each side and the LED is at the top. Label the side of the paper touching the long leg with a small plus sign.
- Using a strip of copper tape the same length as the small paper strip, tape the positive leg of the LED and the positive wire to the side of the paper you just labelled. Do not let the copper tape touch the other side of the paper.
- To keep it more secure, try to only lay the exposed wire from the battery pack on the paper while taping. The copper tape is conductive, so it will act as the path from the battery pack to the LED.
- Repeat step 6 on the other side, using the copper tape to tape the other wire to the small leg of the LED.
- Apply lots of pressure to the tape on both sides to help ensure your light is lit.
- Turn on the switch to test if your circuit works. If it doesn't, check a few things:
- Make sure there is no copper tape touching both sides of the paper at the same time.
- Make sure the exposed wires aren't touching each other.
- The wires might be connected to the wrong side of the LED. Try flipping the side of the paper the wires are connected to.
Optional modification to the circuit:
You might find it easier to have the students wrap copper tape around the wire and the LED leg instead of taping them together on the paper. If doing this, it's important that they bend the LED legs in a way such that the copper tape on each of the legs attaching them to the correct wires do not. The purpose of the paper strip was to keep the circuit in a loop, but you can bend the legs a bit to keep them apart and accomplish the same thing.
Construct the ornament:
Explain to students that they will now create the paper ornament that their light will light up. When you're done, you can find a way to hang them all together like a string of lights, or hang them up as individual decorations around the classroom that students can then take home afterwards.
- With the black/gold/silver coloured paper strip, fold into 6 equal squares.
- Punch a hole in the middle of the 2nd and 5th squares
- Glue or tape the 1st and 6th squares together so that it creates a pentagon.
- Take the coloured paper strip and fold it in half.
- Open it up and fold each side in to meet at the middle fold.
- Unfold and bring the ends together. Adjust the paper into your desired light bulb shape.
- With the two ends of the paper strip together at the top, punch a hole through them. This is where the ribbon will go.
- Slide the strip of paper with your LED into the top of your light bulb, with the battery and wires coming out the top. Secure this using glue or scotch tape on the outside.
- Do not use scotch tape over the copper tape.
- Do not block the holes with your paper strip.
- Slide the pentagon shaped paper overtop the battery pack and over the top of the light bulb shaped paper so all of the holes are lined up.
- Thread the ribbon through all holes and tie in a knot so that it can be hung up.
- Adjust the final design as needed, turn on the battery pack, and admire your light!
Reflect and debrief:
Ask your students to reflect on their learning with some of the following questions:
- Are there any situations that caused the light to not turn on? Why do you think that is?
- How else could you use these materials to create a paper circuit?
- How could you light up more than one LED?
- How is light incorporated into art and design in the real world? What sorts of things would need to be considered when applying light into a design application?
- If you wanted to turn everyone's lights into a single strand of lights that can be turned on with one switch how would that change how the circuit is set up?
- How is this similar or different to what you know or have observed about other strands of decorative lights?
- What other paper creations could you light up with a paper circuit?
Modify or extend this activity
- Consider using a paper circuit as a way for students to demonstrate their learning of other curricular content.
- Collect or review their paper circuits to assess their understanding and abstraction of key content from other curricular areas. (For example, if assessing Socials 7 content relating to geographic landforms, have the paper circuit light up these landforms on a diagram that also contains additional labelled information)
- Extend into experimenting and learning about parallel vs. series circuits with multiple LED lights
- Incorporate paper circuits into a variety of different projects (greeting cards, art, origami, etc.)
Non-circuit version for younger students:
When working with younger grades, consider starting the lesson with a discussion on electricity conservation and the differences between LED and non-LED light strings. You can also talk about electrical safety and how to decorate with light strands safely. To wrap up and reflect on this learning, have students create the paper light ornaments and combine as a class-made garland or hang as individual decorations. This is a great electricity-free alternative for holiday decorating.
Additional resources:
There are many examples of paper circuits online. Here are some additional resources:
- Build a paper circuit - Power Smart for Schools
- Paper Circuits - Science World
- Paper Circuits For Makerspaces - Makerspaces.com
- Paper Circuits - Exploratorium
This work is licensed under CC BY-NC-SA 4.0![]()
![]()
![]()
![]()
Curriculum Fit
Grade 4-9 ADST
Competencies:
Defining
- Choose a design opportunity
- Identify criteria for success and any constraints
Ideating
- Screen ideas against the objective and constraints
- Choose an idea to pursue
Prototyping
- Construct a first version of the product or a prototype, as appropriate, making changes to tools, materials, and procedures as needed
Testing
- Test the first version of the product or the prototype
- Gather peer and/or user and/or expert feedback and inspiration
- Make changes, troubleshoot, and test again
Making
- Use materials in ways that minimize waste
Sharing
- Demonstrate their product and describe their process, using appropriate terminology and providing reasons for their selected solution and modifications
Grade 7-9 Science
Content:
- Electricity is generated in different ways with different environmental impacts (Gr. 7)
- Atomic theory and models (Gr. 8)
- Properties, behaviors, and ways of sensing light (Gr. 8)
- Circuits must be complete for electrons to flow (Gr. 9)
- Voltage, current, and resistance (Gr. 9)
Assessments
- Circulate and take notes on how students are working through the construction of their paper circuits. Align this with your methods on how you assess the ADST curriculum in your classroom.
- Take note of the student’s efforts to troubleshoot and ask questions which help them to understand the circuit and overcome problems making it work.
- Consider collecting the reflections that students perform at the end of the activity using the suggested questions above and use this for a formal assessment. Align this with your methods on how you assess formal reflections in your classroom.
Teaching Notes
Materials
The materials for this activity are unique but should be easy to locate at a reasonable price. The CR2032 coin cell batteries and battery packs are available in any hardware store or dollar store. Copper tape and LED lights might be less common, but they are available in some hardware stores or electronic component stores. If you can't source them locally, they are widely available from online retailers.
Troubleshooting
There are a lot of little things that can affect the success of a paper circuit. If the LEDs aren’t lighting up, consider the following:
- Check that the positive and negative sides of the battery are connected to the correct leads of the LED
- Sometimes pressing down on the leads of the LED will help the connection, or use scotch tape if the LED is not held in place by the copper tape. Look for rips or tears in the copper tape paths
- Ensure that the copper tape attached to one side of the battery doesn’t ever touch the copper tape that is attached to the other side of the battery
- Some copper tape brands do not have conductive adhesive – if this is the case, the leads of the LED can sit on top of the copper tape and be secured with regular scotch tape
- In this instance, taping copper tape on top of another piece of copper tape when making a corner will not continue the path as it will have a non-conductive side of tape touching the conductive side. You will need to instead try and fold it so that the conductive sides are touching and that the leads of the LED are attached to the conductive side of the tape.
If you have questions or need help with this activity, feel free to contact us at schools@bchydro.com.